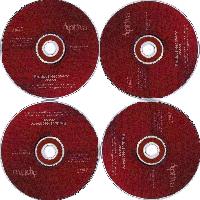


| 2136 | 2137 | 2161 | 2162 | 2140 | 2142 |
. The utility file RESTORE.EXE has proved so useful in the task of restoring deleted or corrupted preload files that IBM has chosen to include it with the latest Aptiva models, first as an included file on the Product Recovery CD (2136, 2137, 2161 and 2162 models) and later incorporated directly as an option while running the Recovery CD itself (2140 and 2142 models).
The directions below are for restoring individual files and directories on such systems.
Restoring files on 2136, 2137, 2161 and 2162 Aptiva Models
- Insert the Aptiva Recovery CD disk into CD-ROM drive.
- Click Start
- Click Run
- Type your restore command
- Click OK
- When the activity on the screen stops, left-click the "X" at the top right of the "Finished-Restore" window.
- Remove Recovery CD and restart system for changes to take effect.
The syntax of restore commands is:
G:\RECOVERY\US\RESTORE [directoryname]\[filename]
to restore individual files and
G:\RECOVERY\US\RESTORE [directoryname]\*.*
to restore entire directories
Examples:
G:\RECOVERY\US\RESTORE VOYETRA\*.*
To restore the IBM AudioStation directory
G:\RECOVERY\US\RESTORE PROGRA~1\IBM\APTDESK\*.EXE
To restore all .EXE files for Aptiva Desktop Customization
G:\RECOVERY\US\RESTORE WINDOWS\SYSTEM\WEBSTER.OCX
To restore the Webster HTML Control
Option: Install RESTORE.EXE to C:\
If you plan on restoring other files in the future, you may optionally choose to copy "restore.exe" to the C:\ drive and run it from there. If you do so the syntax of your restore commands will then be:
RESTORE [directoryname]\[filename]
for specific files and
RESTORE [directoryname]\*.*
for entire directories.
Examples:
RESTORE VOYETRA\*.*
RESTORE PROGRA~1\IBM\APTDESK\*.EXE
RESTORE WINDOWS\SYSTEM\WEBSTER.OCX
NOTE: Be SURE to always include a SPACE after the
word RESTORE in your restore command.
Restoring files on 2140 and 2142 Aptiva Models
- Make sure your computer is turned ON.
- Insert the IBM Aptiva Product Recovery CD in your CD-ROM drive.
- Shut down the operating system and turn off your computer. Wait for the power light to turn OFF.
- Turn ON your computer.
- When you see the prompt "Do you wish to continue (Y/N)?" press "Y" and tap [ENTER].
- When you see the prompt "Do you accept these terms and conditions (Y/N)?" press "Y" and tap [ENTER].
- When you see the Aptiva Recovery Utilities main menu, select "Recover Selected Files".
- From the Recover Selected Files menu, select "Specify a file or directory".
- When you see the prompt "Specify the file or directory you wish to recover:" enter the full path and filename of the file(s) you wish to restore.
- When you see the prompt "Is this correct (Y/N)?" press "Y".
- When the activity on the screen is completed, remove CD and restart computer.
Additional Information:
- For a list of some common Aptiva program directories to help you in determining the proper PATH to use in your restore command Click HERE.
- For information on the pros and cons of restoring files as opposed your other option, reinstalling from the Diagnostics and Utilities CD Click HERE.

� Don Schneider, 1988
DON5408's Unofficial Aptiva Support Site